Installation
System Requirements:
- Node.js 18.17 or later.
- macOS, Windows (including WSL), and Linux are supported.
Automatic Installation
We recommend starting a new Next.js app using create-next-app, which sets up everything automatically for you. To create a project, run:
npx create-next-app@latest
Python
On installation, you'll see the following prompts:
What is your project named? my-app
Would you like to use TypeScript? No / Yes
Would you like to use ESLint? No / Yes
Would you like to use Tailwind CSS? No / Yes
Would you like to use `src/` directory? No / Yes
Would you like to use App Router? (recommended) No / Yes
Would you like to customize the default import alias (@/*)? No / Yes
What import alias would you like configured? @/*
Rust
After the prompts, create-next-app will create a folder with your project name and install the required dependencies.
If you're new to Next.js, see the project structure docs for an overview of all the possible files and folders in your application.
Good to know:
- Next.js now ships with TypeScript, ESLint, and Tailwind CSS configuration by default.
- You can optionally use a
srcdirectory in the root of your project to separate your application's code from configuration files.
Manual Installation
To manually create a new Next.js app, install the required packages:
npm install next@latest react@latest react-dom@latest
Typescript
Open your package.json file and add the following scripts:
{
  "scripts": {
    "dev": "next dev",
    "build": "next build",
    "start": "next start",
    "lint": "next lint"
  }
}
JSON
These scripts refer to the different stages of developing an application:
dev: runsnext devto start Next.js in development mode.build: runsnext buildto build the application for production usage.start: runsnext startto start a Next.js production server.lint: runsnext lintto set up Next.js' built-in ESLint configuration.
Creating directories
Next.js uses file-system routing, which means the routes in your application are determined by how you structure your files.
The app directory
For new applications, we recommend using the App Router. This router allows you to use React's latest features and is an evolution of the Pages Router based on community feedback.
Create an app/ folder, then add a layout.tsx and page.tsx file. These will be rendered when the user visits the root of your application (/).
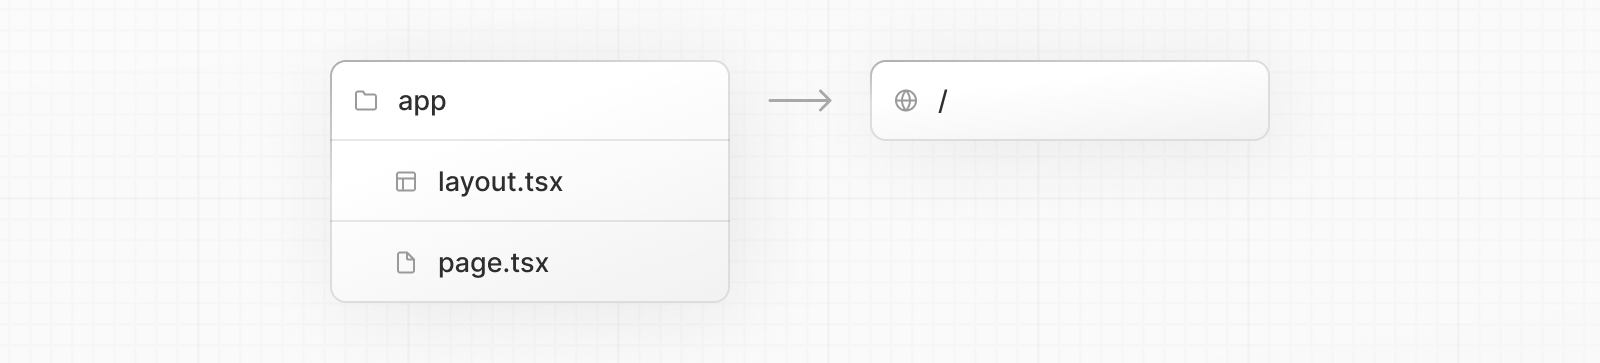
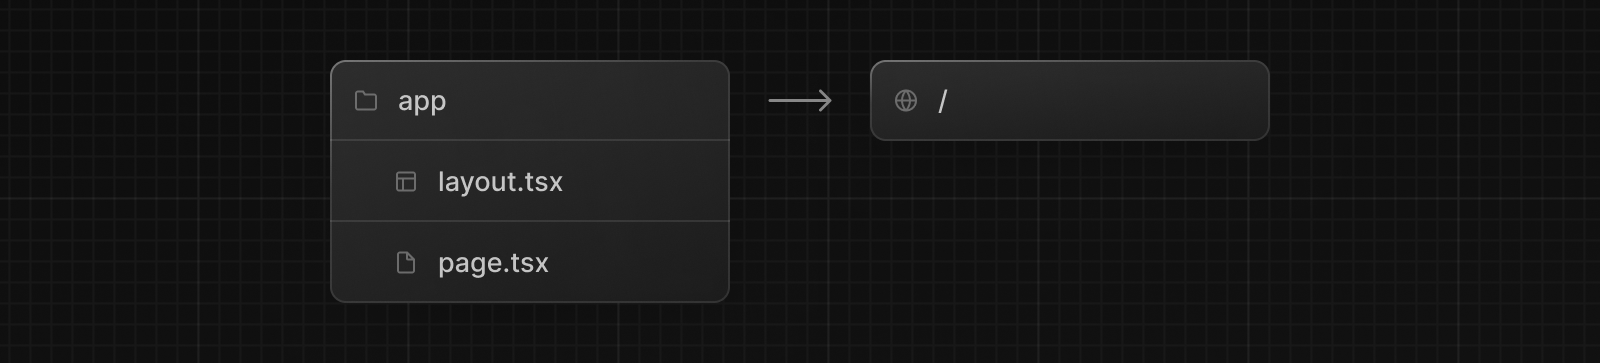
Create a root layout inside app/layout.tsx with the required <html> and <body> tags:
export default function RootLayout({ children, }: { children: React.ReactNode }) { return ( <html lang="en"> <body>{children}</body> </html> ) }Typescriptjavascripttypescript
Finally, create a home page app/page.tsx with some initial content:
export default function Page() { return <h1>Hello, Next.js!</h1> }Typescriptjavascripttypescript
Good to know: If you forget to create
layout.tsx, Next.js will automatically create this file when running the development server withnext dev.
Learn more about using the App Router.
The pages directory (optional)
If you prefer to use the Pages Router instead of the App Router, you can create a pages/ directory at the root of your project.
Then, add an index.tsx file inside your pages folder. This will be your home page (/):
export default function Page() { return <h1>Hello, Next.js!</h1> }Typescriptjavascripttypescript
Next, add an _app.tsx file inside pages/ to define the global layout. Learn more about the custom App file.
import type { AppProps } from 'next/app' export default function App({ Component, pageProps }: AppProps) { return <Component {...pageProps} /> }Typescriptjavascripttypescript
Finally, add a _document.tsx file inside pages/ to control the initial response from the server. Learn more about the custom Document file.
import { Html, Head, Main, NextScript } from 'next/document' export default function Document() { return ( <Html> <Head /> <body> <Main /> <NextScript /> </body> </Html> ) }Typescriptjavascripttypescript
Learn more about using the Pages Router.
Good to know: Although you can use both routers in the same project, routes in
appwill be prioritized overpages. We recommend using only one router in your new project to avoid confusion.
The public folder (optional)
Create a public folder to store static assets such as images, fonts, etc. Files inside public directory can then be referenced by your code starting from the base URL (/).
Run the Development Server
- Run
npm run devto start the development server. - Visit
http://localhost:3000to view your application. - Edit
app/page.tsx(orpages/index.tsx) file and save it to see the updated result in your browser.